Home Tweet Home
Once again, I have gone several weeks without a post. I do have a legitimate reason...the Hinkelman's have been aggressively looking for employment. With this going on, my machine time has been limited. But, today I, as my friend said, decided to treat myself to a new project!
The project: A birdhouse wallhanging
Fabric selection: 30's reproductions (This pattern works perfectly for scraps!)
Method: Foundation Paper Piecing (One of my absolute favorites!!!)
If you have not tried FPP, I strongly encourage you to give it a try. I really enjoy it! The process is fun and making tiny blocks (this one is 2" finished) is much easier! You simply sew chunks of fabric to foundation paper like this:
 |
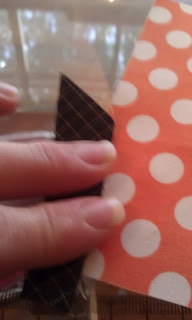
| Align the first fabric face down with the second fabric face up like this. |
 |
| There is no real need to press between stitching seams. I simply finger press the seams. |
 |
| Then layer fabric 3 face up and sew along the seam line. |
 |
| Holding the paper and fabric out of the way, clip the excess to make a 1/4" seam. |
 |
| At this point, I did take my block to the iron so that I could be sure they next set of fabrics went on correctly. |
|
Hey! Did you happen to catch a glimpse of the snazzy scissors I am using??? They are Gingher spring action scissors. I forget the actual size, but these puppies are simply awesome! My sweet Daddy got them for me off of eBay. These work perfectly for FPP!
 |
| Sweet, huh? |
I digress... Back to the project at hand!
 |
| I've added the next 2 fabrics to unit one. |
 |
| This is a view of the back side. |
 |
| This is unit 2 of the block. |
Next, I need to trim the excess fabric from the two units so I stitch them together.
 |
| Unit 1 trimmed |
 |
| Units 1 and 2 trimmed |
 |
| Layer the two units right sides together and stitch. |
There are 12 blocks, or birdhouses, to this wall hanging. They came out like this:
My least favorite part of FPP is removing the paper from the back after sewing the blocks. My friend has the secret weapon...Tiff the Paper Peeler...at her disposal! I wish I had one of these too! ;-)
 |
| This is only a portion of the trash. Hee2 |
But, check out the results:
 |
| Birdhouses sewn together for center |
 |
| Inner border added |
 |
| Outer border added |
And the final touch of cuteness... I am going to sew on buttons for the bird house doors. I think it will be precious!
Well, that is all for today. I hope you are having a great night!
~ J


Die Häuschen sehen sehr, sehr schön aus.
ReplyDeleteLiebe Grüße Grit
Very nice tutorial. Love the quilt!!! You did great!
ReplyDeleteThank you Grit and Chantal! They are soooo fun to make! I finished quilting it today and will whipstitch the binding tonight! I cannot wait to display it in the house!
ReplyDeleteLove it! Love the tutorial too!
ReplyDeleteThank you sweet Vicky! Miss you my friend!
ReplyDeleteDitto!
Delete